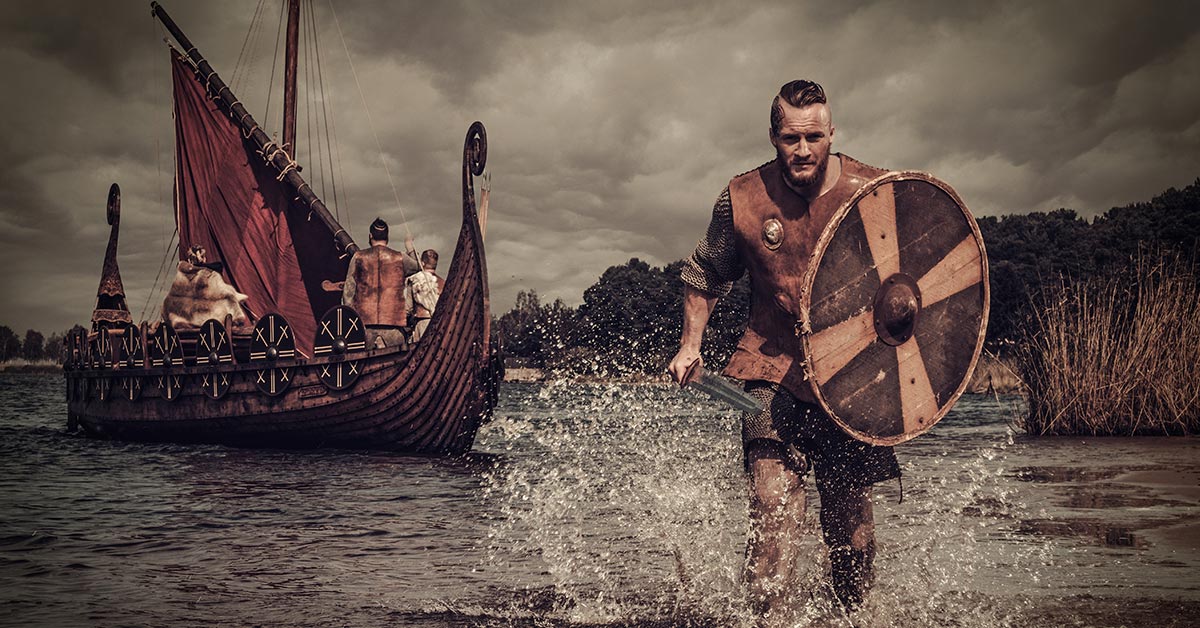
The Viking shield is more than just a piece of armor; it’s a symbol of strength, valor, and unique cultural identity.
Throughout this guide, we’ll explore the rich history and significance of this iconic emblem while guiding you through the process of creating your very own replica, merging ancient traditions with modern techniques.
Introduction: The Significance of the Viking Shield
Before embarking on the journey of crafting a Viking shield, it’s essential to understand the depth of its significance in Norse culture and history.
Role of the Shield in Viking Culture and Warfare
Central to Viking warfare, the shield served as both protection and a weapon. These round shields not only defended against attacks but were also used offensively, aiding in tactical maneuvers during battles.
A Viking’s shield was a prized possession, reflecting his prowess and standing in the community.

Symbolic Importance and Decoration
The shields were more than functional tools. Often painted and decorated, they told tales of heroic feats, and spiritual beliefs, or were adorned with symbols invoking protection from the gods.
These decorations provided insights into the personal stories and aspirations of the warriors who bore them.
Materials and Tools Required
Now that we’ve explored the significance of the Viking shield, let’s delve into the materials and tools necessary to craft one. By understanding both traditional and modern options, you’ll be better equipped to make choices that suit your desired outcome.
Traditional Materials Used by the Vikings
The Vikings utilized resources available in their environment, prioritizing durability and functionality.
Wood Types and Selection
The primary material for these shields was wood, often oak, ash, or pine. These woods provided the strength and resilience required on the battlefield. The selection of wood determined the shield’s weight, sturdiness, and ease of maneuverability.
Iron and Leather
For the shield’s central boss (the domed metal piece in the center) and the rim, Vikings often used iron. Leather or rawhide, meanwhile, provided an added layer of reinforcement and protection.
Decorative Elements
Various natural pigments were used to paint the shields. Sometimes, they also incorporated intricate carvings or metal embellishments to convey particular stories or symbols.
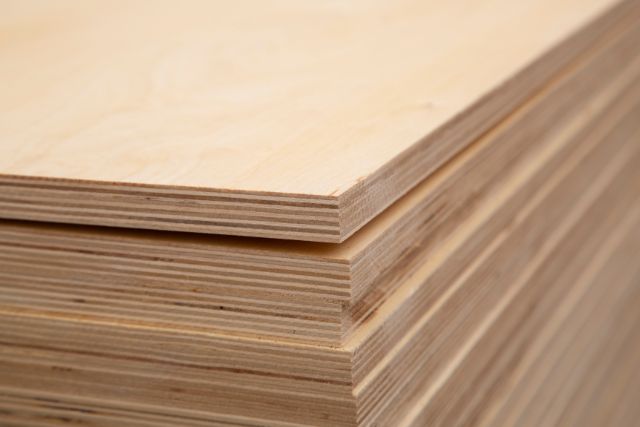
Modern Equivalents and Alternatives
While staying true to the traditional methods can be fulfilling, modern materials offer durability and cost-effectiveness. Plywood, for example, can serve as a suitable wood alternative.
Modern paints and varnishes also offer a wider range of color choices and protective properties.
Essential Tools and Equipment
Having the right tools is crucial. For this project, you’ll need saws, chisels, hammers, nails, and perhaps a leather sewing kit if you’re incorporating leather components. Additionally, brushes and paints are essential for the decorative phase.
Step-by-Step Guide to Crafting Your Shield
With all materials and tools at the ready, let’s dive into the step-by-step process of creating your Viking shield.
Preparing the Wood
The foundation of your shield begins with selecting and preparing the wood.
Choosing the Right Plank
Choose a plank free of knots or imperfections. It should be of uniform thickness, ensuring a sturdy yet lightweight shield.
Cutting and Shaping
Once selected, cut the plank into a perfect circle of your desired size. Remember, the average Viking shield was about 30 to 35 inches in diameter. However, you can adjust the size based on your preferences.
Creating the Shield’s Core
This involves layering and reinforcing the wood. Some shields had multiple layers of wood glued together to ensure added strength. Ensure the layers are bonded securely.
Attaching the Metal Boss
The central boss serves as protection for the hand and as an offensive tool. While you can make this yourself, it may be easier to purchase one that is premade. Attach it securely at the shield’s center, ensuring it’s evenly placed.

Reinforcing the Shield with Leather or Rawhide Edging
Wrap the shield’s circumference with leather or rawhide strips, stitching or nailing them securely. This not only strengthens the shield but also prevents it from splitting.
Applying Decorative Elements
Now, bring your shield to life with colors and designs.
Painting
Use your chosen paints to create intricate patterns, symbols, or scenes. Remember to let each layer dry thoroughly before applying the next.
Carvings and Other Embellishments
If you’re skilled in woodworking, consider adding carvings. Additionally, metal studs or other embellishments can be added for both aesthetics and functionality.
Tips for a Sturdy and Authentic Shield
While following the steps will get you a Viking shield, refining your craftsmanship will make it stand out.
Understanding Viking Craftsmanship
Vikings took great pride in their work. Delve into historical records or artifacts to glean insights into their techniques and styles. This will aid in replicating a more authentic look.
Maintaining the Balance Between Authenticity and Practicality
While it’s tempting to strive for 100% authenticity, consider your shield’s intended use. If it’s for decorative purposes, focus on aesthetics. However, if you aim for practical use, durability should be a priority.
Shield Maintenance and Care
Once your masterpiece is complete, maintaining its beauty and integrity is crucial.
Protecting the Wood from Elements
Regularly apply a protective layer of varnish or wood sealant to prevent moisture damage and warping.
Keeping the Metal Parts Rust-Free
Clean and oil the metal components, especially after exposure to moisture, to prevent rust.
Preserving the Artwork
If your shield is painted, avoid exposing it to direct sunlight for extended periods, which can fade the colors. A protective clear coat can also be applied to guard against scratches and chipping.
Historical Context: Evolution of Viking Shields
The Viking shield did not remain static throughout history. It evolved with the times, reflecting the changing needs and influences of Viking society.

Origins and Early Designs
The earliest Viking shields were simple, focusing on function over form. As the Vikings ventured out, trading and raiding, their shields began to incorporate diverse designs and improvements, influenced by the cultures they encountered.
Impact of Warfare and Trade on Shield Development
With the evolution of warfare techniques and exposure to different materials through trade, Viking shields saw improvements in both design and materials. The fusion of cultures brought about a richer tapestry of shield designs, each telling a unique story.
Conclusion: Embracing the Warrior Spirit
Crafting a Viking shield is more than a DIY project. It’s a journey into history, artistry, and the warrior spirit that defined the Viking Age.
Whether you’re showcasing it on your wall or bearing it in a reenactment, let your shield be a testament to the Viking legacy and your craftsmanship.
Of course, if making it seems all a bit too much and you just want one now, check out our best Viking shields to purchase right away.
References and Further Reading
While this guide provides a comprehensive overview, the world of Vikings is vast and captivating. For those eager to delve deeper, consider exploring scholarly articles, historical records, and museum collections. Embrace the adventure, and may your shield stand strong!