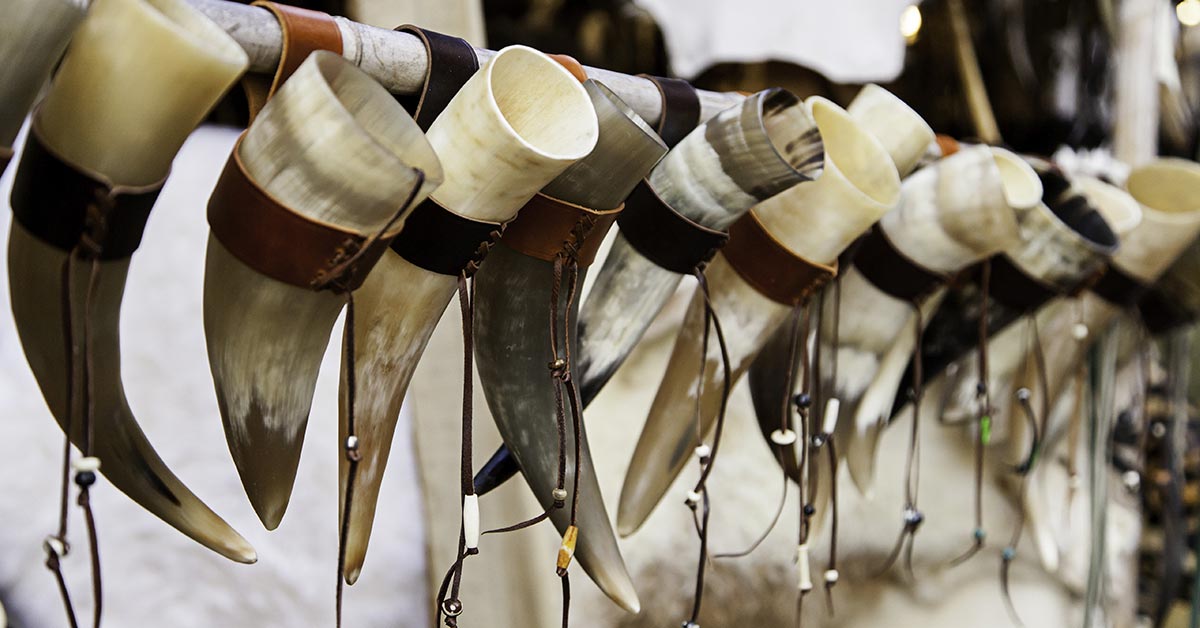
Embarking on the journey to craft a drinking horn is like stepping back in time to the age of Vikings and medieval knights.
It’s a project that combines artistry with a touch of history, offering a sip of the past in every gulp.
Whether you’re a history enthusiast or a crafting aficionado, this guide will lead you through the ancient craft of making your own drinking horn, ensuring every step is as rewarding as the first drink you’ll take from it.
Introduction
The drinking horn holds a storied place in history, not just among the Norse but across various cultures worldwide.
These vessels were more than just containers for mead or ale; they were symbols of status, intricately decorated and often passed down through generations.
Today, the allure of crafting your own drinking horn lies not only in its historical significance but also in the personal touch and creativity that goes into its creation.
History and Significance of Drinking Horns
Drinking horns date back to the Neolithic period, transcending mere functionality to become emblematic of strength and honor in Viking and medieval societies.
Imagine Vikings toasting to their victories or medieval lords sealing pacts over horns filled to the brim. The tradition of drinking from horns is steeped in ritual, a testament to their enduring legacy.
Types of Drinking Horns
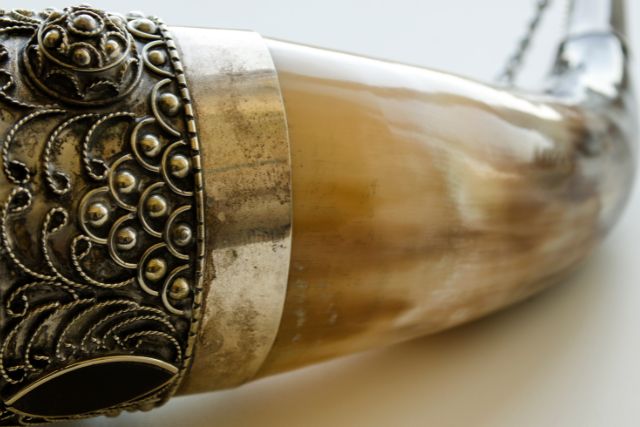
From the simple bovine horn to the lavishly adorned ceremonial ones, drinking horns come in various shapes and sizes.
Some were designed for daily use, rugged and straightforward, while others were ornate, embellished with metals and carvings to tell stories or showcase wealth and power.
Benefits of Making Your Own Drinking Horn
Creating a drinking horn is not just about holding a piece of history; it’s about forging a connection to the past with your own hands.
It’s a personal journey into craftsmanship, offering a unique blend of historical authenticity and personal flair. Plus, it’s a fantastic conversation starter at any gathering.
Materials Needed
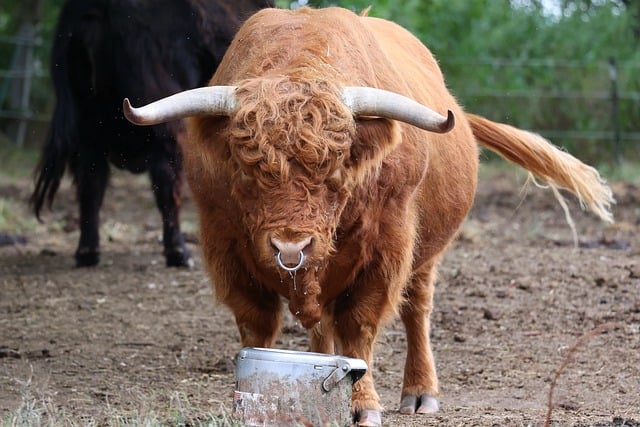
Before diving into the creation process, gathering your materials is key. You’ll need a raw horn, which can be sourced from livestock or specialty stores, alongside tools for shaping and decorating.
Remember, selecting the right horn is the first step in ensuring your project’s success.
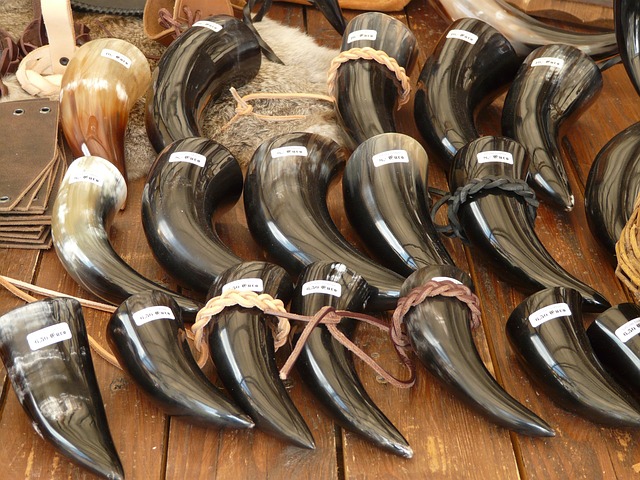
Choosing the Right Horn
Look for a horn that speaks to you in size, shape, and color. Bovine horns are most commonly used, offering a good balance of size and manageability.
Ensure the horn is ethically sourced, respecting both the animal and the craft’s heritage.
Tools and Safety Equipment
You’ll need a variety of tools, from saws for cutting to sandpaper for smoothing.
Don’t forget safety gear like gloves and masks, as working with raw horn can produce dust and splinters. A well-prepared crafter is a safe crafter.
Decorative Materials
From paint to metal inlays, your decorative materials will bring your horn to life. This is where you can let your creativity shine, personalizing your horn to reflect your style or historical interest.
Preparation of the Horn
The first step in the transformation from a raw horn to a drinking vessel is preparation. This involves cleaning, shaping, and polishing the horn, laying the groundwork for a masterpiece.
Cleaning the Horn
This step is crucial for health and aesthetics.
Start by giving your horn a thorough cleaning, both inside and out. Soapy water can remove initial grime, but you may need to soak the horn to soften and remove the inner keratin core.
Shaping the Horn
Shaping your horn is where the real work begins. Decide on the length and curve, then carefully cut and sand the horn to your desired shape.
This process requires patience and a steady hand but is deeply satisfying.
Polishing the Exterior
Polishing transforms the rough horn into a smooth, tactile piece. Begin with coarser grits of sandpaper and work your way up to finer grits until the horn shines.
This step reveals the horn’s natural beauty, setting the stage for further embellishment.
Hollowing and Smoothing the Interior
With the exterior shaped and polished, the focus shifts to the interior. Hollowing and smoothing are vital to making your horn safe and enjoyable to drink from.
Methods for Hollowing Out the Horn
Removing the core of the horn can be challenging but is essential for creating a usable vessel. Techniques vary from boiling to manual scraping.
Each method has its merits, but all require diligence to ensure a clean and even interior.
Smoothing the Interior Surface
After hollowing, the interior must be smoothed to prevent any unwanted texture or taste. Fine sandpaper or a Dremel tool can achieve a smooth finish, readying the surface for sealing.
Sealing and Waterproofing
No matter how well you craft your horn, without proper sealing, it won’t hold your drink of choice. Sealing and waterproofing are crucial steps in ensuring your horn’s longevity and usability.
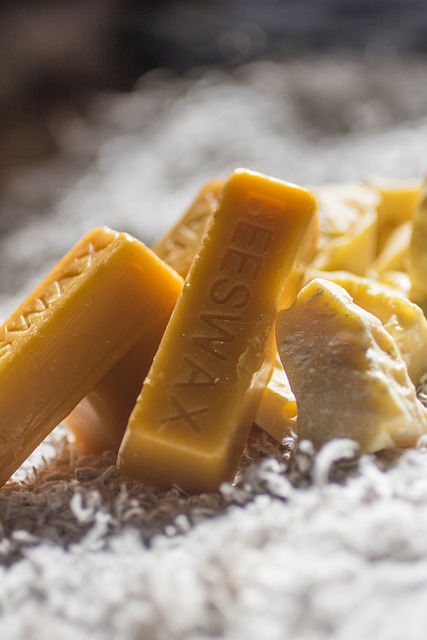
Choosing the Right Sealant
Select a sealant that is safe for contact with food and drink. Beeswax is a traditional choice that adds a natural aroma and flavor, enhancing the drinking experience.
Application Techniques
Applying sealant evenly is key to preventing leaks. Heat the beeswax and pour it into the horn, rotating to coat the interior thoroughly.
This method also helps in achieving an even layer that will protect your horn for years to come.
Testing for Leaks
Once sealed, test your horn for leaks with water before moving on to stronger spirits. It’s better to find and fix any issues now than during your first toast!
Decorating Your Drinking Horn
Decoration is where your drinking horn truly becomes your own. Drawing on history or your imagination, you can transform the horn into a work of art.
Traditional Designs and Symbols
Researching traditional designs can inspire your decorations. Whether you opt for Norse runes, Celtic knots, or medieval heraldry, these symbols add layers of meaning to your horn.
Modern Decoration Ideas
If historical accuracy isn’t your goal, modern motifs can personalize your horn. Think of your interests and hobbies or even inscribe a favorite quote or joke for a truly individual touch.
Engraving Techniques
Engraving adds texture and depth to your designs. Whether by hand or with a Dremel, the key is to proceed with care, allowing the horn’s surface to guide your tool.
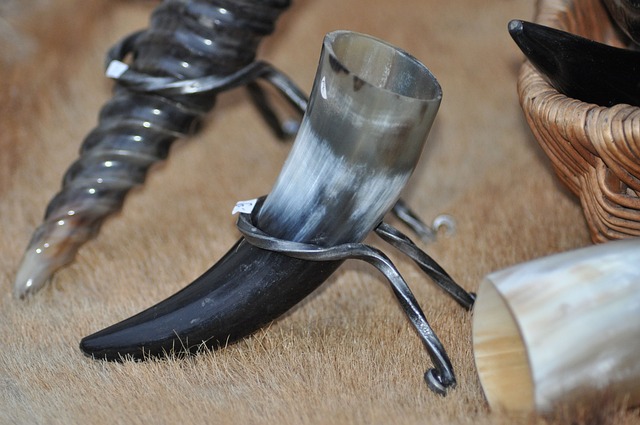
Creating a Stand or Holder
A stand or holder not only displays your horn beautifully but also keeps it safe and ready for use. Crafting one is a project in itself, offering another opportunity to express your craftsmanship.
Design Ideas for Horn Stands
Stand designs can range from simple wooden bases to intricate metal frameworks. Your stand should reflect the style and era of your horn, creating a cohesive presentation.
Materials and Tools
Choose materials that complement your horn—wood for a traditional look or metal for a modern twist. The tools you’ll need depend on your material, from woodworking tools to metalworking equipment.
Assembly Instructions
Assembling your stand requires precision and planning. Measure twice, cut once, and always be mindful of the balance.
Your horn should sit securely and prominently, a testament to your hard work and creativity.
Finishing Touches
As you near the end of your project, the finishing touches are what set your horn apart.
A final polish, protective coatings, and meticulous detailing can elevate your horn from a crafting project to a cherished keepsake.
Final Polishing
A last polish brings out the horn’s luster, highlighting your hard work. Use a soft cloth and gentle polish to give your horn a gleaming finish that catches the light and the eye.
Applying Protective Coatings
A protective coating, especially on the outside, can preserve your horn’s appearance and integrity. Choose a non-toxic, food-safe option to keep your horn looking as good as the day you finished it.
Caring for Your Drinking Horn
After pouring so much effort into your drinking horn, proper care will ensure it lasts for many toasts to come. Simple, regular maintenance can keep it in prime condition, ready for any feast or festival.
Cleaning and Maintenance
Clean your horn with warm, soapy water after each use, avoiding harsh chemicals that can damage the material. Allow it to dry completely before storing it to prevent mold or unpleasant odors.
Storing Your Horn
When not in use, store your horn in a cool, dry place away from direct sunlight. A stand not only displays your horn but also keeps it safe and aired, preventing damage and warping.
Conclusion
Making your own drinking horn is a journey through history, craftsmanship, and personal expression.
Each step, from selecting your horn to the final polish, connects you to the past while allowing you to create something truly individual.
So raise your horn, filled with your drink of choice, and toast to the skill and patience that brought it to life. Here’s to creating something that not only holds your beverage but also holds a story—your story.
 Authentic 16-oz. Ale, Mead, and Beer Tankard | Vintage Stein with Handle | Custom Intricate Design - Polished Finish | Wolf/Fenrir")


")